This is my personal blog that hopefully others will enjoy finding information on projects, ideas, etc. that I have created, scraplifted or borrowed :)
Showing posts with label Pink By Design Stamps. Show all posts

Tuesday, September 25, 2012

A Mini Album: The Sweetest Story Ever Told

As you may know from reading my posts over the last few months, my husband Ed was diagnosed with stage 4 colon cancer back in May.  He has been going through chemo and is now having surgery tomorrow. I wanted him to have something to keep at the hospital to remind him of us because he will be in there for 5 days.  I also think he can take it to chemo with him or just look at it whenever he is having a bad day to remind him how much we love him.  This may be my first "real" mini album.  I used the Cricut Artiste and the chip board that came with it.  I used some paper I had, I think from a few different stacks and I used a few different stamps from Pink by Design as well as one $1 stamp (worlds best dad).  I also had the kids each write him a note and I wrote one as well (I helped my 3 year old, she help my hand as we wrote it together). He cried when he opened it and looked through it.  So did I.


I can only pray that one day we both look back at this album and all of the worry we had and be thankful for how much it made us appreciate what we have.

Thanks for stopping by, I hope you all have a crafty and blessed day!

PS:  I will be linking this up over at Sarah Hamer Designs so stop by and link up too!  http://www.pinkcricut.com/2012/09/link-tuesday-21/

Tuesday, July 24, 2012

Wedding Card

Hello all.  Wow, I really have not been crafting lately!  Things are so busy with Ed and the kids so I do not have much free time but I did get to make a simple card for a wedding.  I also made some tags for the wedding favors but I will share those later!  I used some simple hearts (Art Philosophy) that I then used a very small recollections punch to cut out hearts.  I then used Art Philosophy to cut a small tag and used my Pink By Design Big Thoughts set to stamp love.  Lastly, I inked the edges of the small tag.  I loved the background paper with all of the XOXOXOXO's on it and it matched the colors of the wedding so it was perfect!


Thanks for stopping by!  Hope you have a crafty day.

PS: I am linking this up over at Sarah Hamer Designs, so stop by and link up too!  http://www.pinkcricut.com/2012/07/link-tuesday-13/

Friday, June 8, 2012

End of Year Teacher Gifts From My Boys

Today is the last day of school for my boys (5th and 3rd grade) so I had to get those teacher gifts done!  I always do one for each homeroom teacher and the Principal and school Secretary.  I also did one for my older sons religion teacher because he has her every day.  They are almost the same as I did for my daughters preschool teachers except for these I had cute wicker bags I found at Target for $2.50.  I bought them probably 2 months ago and luckily used them (most things I buy just keep sitting here :)


I added a beach towel, two puzzle books, a pen and pencil, sunglasses, a water bottle and a spray bottle to each bag (most items were from the $1 store or $1 section).  I printed the tags on the computer and then cut the suns from Create a Critter.

I also used some cards I made using the One Sheet Wonder like I did for my daughters teachers.  I used Pink By Design stamps, Our Teachers and Big Thoughts, for the sentiments on the cards.


The school has been so wonderful since Ryan (my oldest-11 years old) started in kindergarten when he was 5 and they have especially been so caring and generous over the last few weeks since Ed received his cancer diagnosis so this is really the least I could do for them.  My 8 year old Kyle even told me last night that he did not want school to end because he would miss his teacher so much and that she is like a second mom to him.  I really could not ask for more. :)

Thanks for stopping by and have a crafty day!

Thursday, May 24, 2012

End of the Year Teacher Gifts from my Preschooler

Wow, has it been a long time!  Things have been very busy around my way and I just have not had time to craft.  They have also been tough.  We found out last week that my husband has Colon Cancer, which has spread to his abdomen and liver (he is only 37, can you believe it).  We are gearing up for the fight of our lives but I know in my heart he can and WILL beat it.  We have so many people praying for us that I know it is impossible for him not to make it through.  He started chemo this week and has had so many appointments so I decided to get my craft supplies together so I am able to craft while I wait (crafting while waiting is what I call it).  I am working use one of those One Sheet Wonder (OSW) templates to make some thank you cards to have them on hand since people are being SO generous with gifts and food to try to make things easier for us (we are so blessed with such caring friend and family).

Although this is all going on I did not want to neglect my daughters teachers and her last day of preschool was today.  I bought some cute little summery tote bags at Target in the $1 section and filled them with a beach towel, a water sprayer, some sunglasses, word find and soduku books, a pen and a pencil.  I used a card from the OSW set I am making to write a note for each teacher to put in their bag also and then I made a cute little tag for the bag.  I find a similar tag online for the inspiration but I changed the words a little.  I wish I could remember where to share but that was months ago.  If I find it I will post the link.  Anyway, here are the final products.  I hope the teachers enjoy them this summer!


I used my Pink by Design Our Teachers set to do the Thank you teacher stamp and then used an old creative memories punch to punch out the star.  It worked perfectly!  The I love school paper was from a cute 81/2 X 11 paper pack I got at Michaels a couple of weeks ago on sale.  It has school buses, apples and a chalkboard with letters type paper in it.  I plan to do some with the apples to have on hand or give to the teachers as gift set too.  The one sheet wonders are amazing.  

I also included my baby on her last day of school (not really my baby because I have an almost 3 year old but they are all my babies :)

Well, I will be back (soon?) with some pictures of my baby girl Mady's 3rd birthday invitations (Mickey Mouse) and I will need to do the other teachers for my boys in June so hopefully I will be back sooner than later.

If you don't mind, say a prayer or two for my husband.  We could use all we can get these days :)

Thanks and have a crafty day.

PS:  I am linking up to Sarah Hamer Designs, so stop by and link up too!  http://www.pinkcricut.com/2012/05/link-tuesday-7/

Friday, February 3, 2012

Teacher Appreciation Day!

Today is Teacher Appreciation Day at my boys school.  I just wanted to do something simple and seen the idea of using Extra gum a while back (probably on Pinterest, LOL).  I decided to make a little goodie bag with the gum in it and I wanted to make a cute apple topper.  

Here is what I came up with:


I made the sentiment on my computer and printed it on white card stock and then  used green card stock as a base for it.  I then just stuck it right on the pack of Extra gum :)  I welded two hearts from Doodlecharms (Cricut) in Cricut CraftRoom to make the bag toppers.


I welded two apples from Doodlecharms (Cricut) in Cricut CraftRoom to make the bag toppers.  


 I used Pink By Design Our Teachers stamp set for the sentiment (it is we appreciate you teacher) and I altered it by not inking the teacher and then used the Principal from the You put the PAL in Principal from that set.  I then used December stamp of the month set and die for the little tag and tag frame stamp.  I added a heart to the principal one but was unsure if I liked it so I did not add it to the others.


I also used Doodlecharms to cut the  leaf from that cartridge also.  I hand cut the stem.  I embossed them both using my Cuttlebug (for the first time), using dots for the leaf and wood grain for the stem.

I know it is just a pack of gum but I think it is the thought that counts (we also do a gift to each teacher from the entire class, so this is just a little "extra", HAHA).  I did one for each of the 4 teachers my boys have and for the principal and school secretary.

Thanks for stopping by.  I hope you have a crafty day!

PS:  Since I used my Pink By Design stamps (again :)) I am linking this up over at http://www.pinkcricut.com/ to the 1/31/12 Link Up party!  You should stop by and take a look!

Wednesday, January 25, 2012

CWC Weekly Challenge # 70-No Cards, Must have polka dots and use yellow!
Hello and welcome to another Weekly Challenge with Cooking with Cricut.  This week we were challenged to make anything but a card and it has to have polka dots and the color yellow.  I needed to make a thank you gift for a couple we are close friends with, I made the wife's thank you gift already (which I posted earlier this week here) and now I needed something manly, LOL.  I usually buy the husband a small bottle of liquor each year for their holiday party, it started as a little joke but has carried on each year.  So since I know he has already used that bottle I thought as the thank you I would buy him another one but this time I wanted to put it in something with a little note of thanks on it.  I found this idea online at http://cabioscraftcorner.blogspot.com/2011/12/magnolia-edwin-label-tag-on-mini-bottle.html and it was perfect!  (I always look online first because why recreate the wheel, right!).  Here is her post with the details http://cabioscraftcorner.blogspot.com/2012/01/mini-bottle-holder-tutorial-using.html.  The only difference I did was for my tag I used a 2 inch scalloped circle and a 1.5 inch circle.  I put the large stickles bottle inside, you could easily adjust the size and score lines to make it a little smaller for a small bottle of stickles.  I think next I will try and see if I can do like 4 or 6 and attach them to make a 4 or 6 pack.


I used my Cricut Art Philosophy to cut the 1.5 inch yellow circle and 2 inch scalloped circle but other wise it was just scoring and cutting in the right places.  I used my Pink by Design Big Thoughts stamp set for the Thanks so much sentiment (which was perfect).  Unfortunately, I do not have the bottle of liquor yet so I had to used a bottle of stickles as a stand in for the picture :) but you get the idea (you could also use it to give a bottle of stickles as a gift too because they fit perfect!).  I think I may do something like this but in a Christmas theme next year for the holidays, what a cute little "grown-up" gift!  Plus even if you do not drink (like me) those little mini bottles are so darn cute!

Thanks for stopping by, make sure you head over to Cooking with Cricut and get in on this weeks challenge!

PS: Because I used my Pink By Design stamps I am also "linking" this up over at http://www.pinkcricut.com/ for this weeks link up party!

Have a crafty day!

Monday, January 23, 2012

Cartridge Showcase at CWC: Spring Holiday Cards

Hello everyone, today I am spot lighting the Cricut cartridge Spring Holiday cards over at Cooking with Cricut so I hope you will stop by and take a look :)  Here a peek at a project I made using it:


Thanks and have a craft day!

Tuesday, December 20, 2011

Easy Hot Cocoa Teacher Gifts

Hello all!  I made these cute hot cocoa holders using the same theory as the gum advent calendars from Pink Cricut.  This time I just sort of free handed it in terms of measurements.

Here they are:


I added two packs of hot cocoa, then I closed it, punched a hole and tied a ribbon through, I also added two small bags (I had the bags on hand) of marshmallows and put those through the ribbon and tied it closed.  I then made a small tag and stamped it with my Pink by Design December Stamp of the Month set.  Lastly, I cut out a gift card holder that I made using Cricut CraftRoom and Art Philosophy and put it on the back of the little hot cocoa book.  Easy!  The teachers loved these and I already received one thank you card for them!  I have made 5 of these so far (my 3 year olds two teachers, my co-teacher for Sunday school and our two high school helpers).  I plan to do at least 6 more once I get some more hot chocolate for the teachers at my sons school.  I probably will not add gift cards to those because we do that as a class.  Instead I think I may add two chocolate spoons.  If I do I will add that in another post.  Thanks for stopping by today!

PS:  Don't forget to keep up with us over at Cooking with Cricut as our 25 days of crafting fun finish up this week :)

Thursday, December 1, 2011

Gum Advent Calendars

So on my way to take my boys to school (at a stop light) I see todays posting from Pink Cricut and think OMG, I HAVE to make these!  So today as soon as I get done with work (I work from home on Tuesday and Thursdays thank goodness) I quickly make them.  The boys LOVED them because they both love gum and this ensured they could have one piece at least for the next 24 days, LOL.  My one son does not like minty gum so I had to do his a little different to give him the Trident he likes but it still worked! 

Here they are:


I used a Marth Stewart corner and edge punch for the top/side edges.  I used Pink By Designs November stamp of the month set and die for the front...isn't it perfect!  It was SUPER easy but so darn cute!  I only used 1 sheet of patterned paper and some white scratch paper for the sentiment and for the paper to hold the trident (I just stuck it on the paper with the opening side facing up so that my son could still open the gum without having to remove it from the paper).  You certainly could make yours prettier but pretty is usually lost on my boys so I went with simple :)

Now, if you want to know how to make one, stop over at Pink Cricut and watch Sarah's tutorial! 

Wednesday, November 9, 2011

CWC Wednesday-Fruits, Harvest, Cornucopia, etc.

Hello, welcome back for another Cooking with Cricut Wednesday Weekly challenge!  This weeks theme is fruits, harvest, cornucopia, etc.  I decided to make a table centerpiece, something I could put on a tray and put in the middle of the table.  I made two paper pumpkins, two paper apples and a little turkey (I may end up making a few more turkeys, maybe one for each family member in different sizes). 

Here it is:


Each item was super easy.  I tried to explain it here in writing but even I confused myself so I thought this would be a great time for my first video!  So here you go, take a look and let me know what you think :)


I did not talk about my cute little turkey in the video, for him I used the super easy directions from Pink By Designs ustream last Friday to make him.  I used a borrowed (but now I have to buy it) Peachy Keen stamp from the Critter Faces set, to give my turkey a cute little face.


I think these will all look cute on the table once I find a little tray to put them on!  

Now it's your turn! I hope you will head on over to Cooking with Cricut to enter your project! TFL.

Have a crafty day!

Monday, November 7, 2011

A Funny Little Gift-A 5 Hour Energy Holder

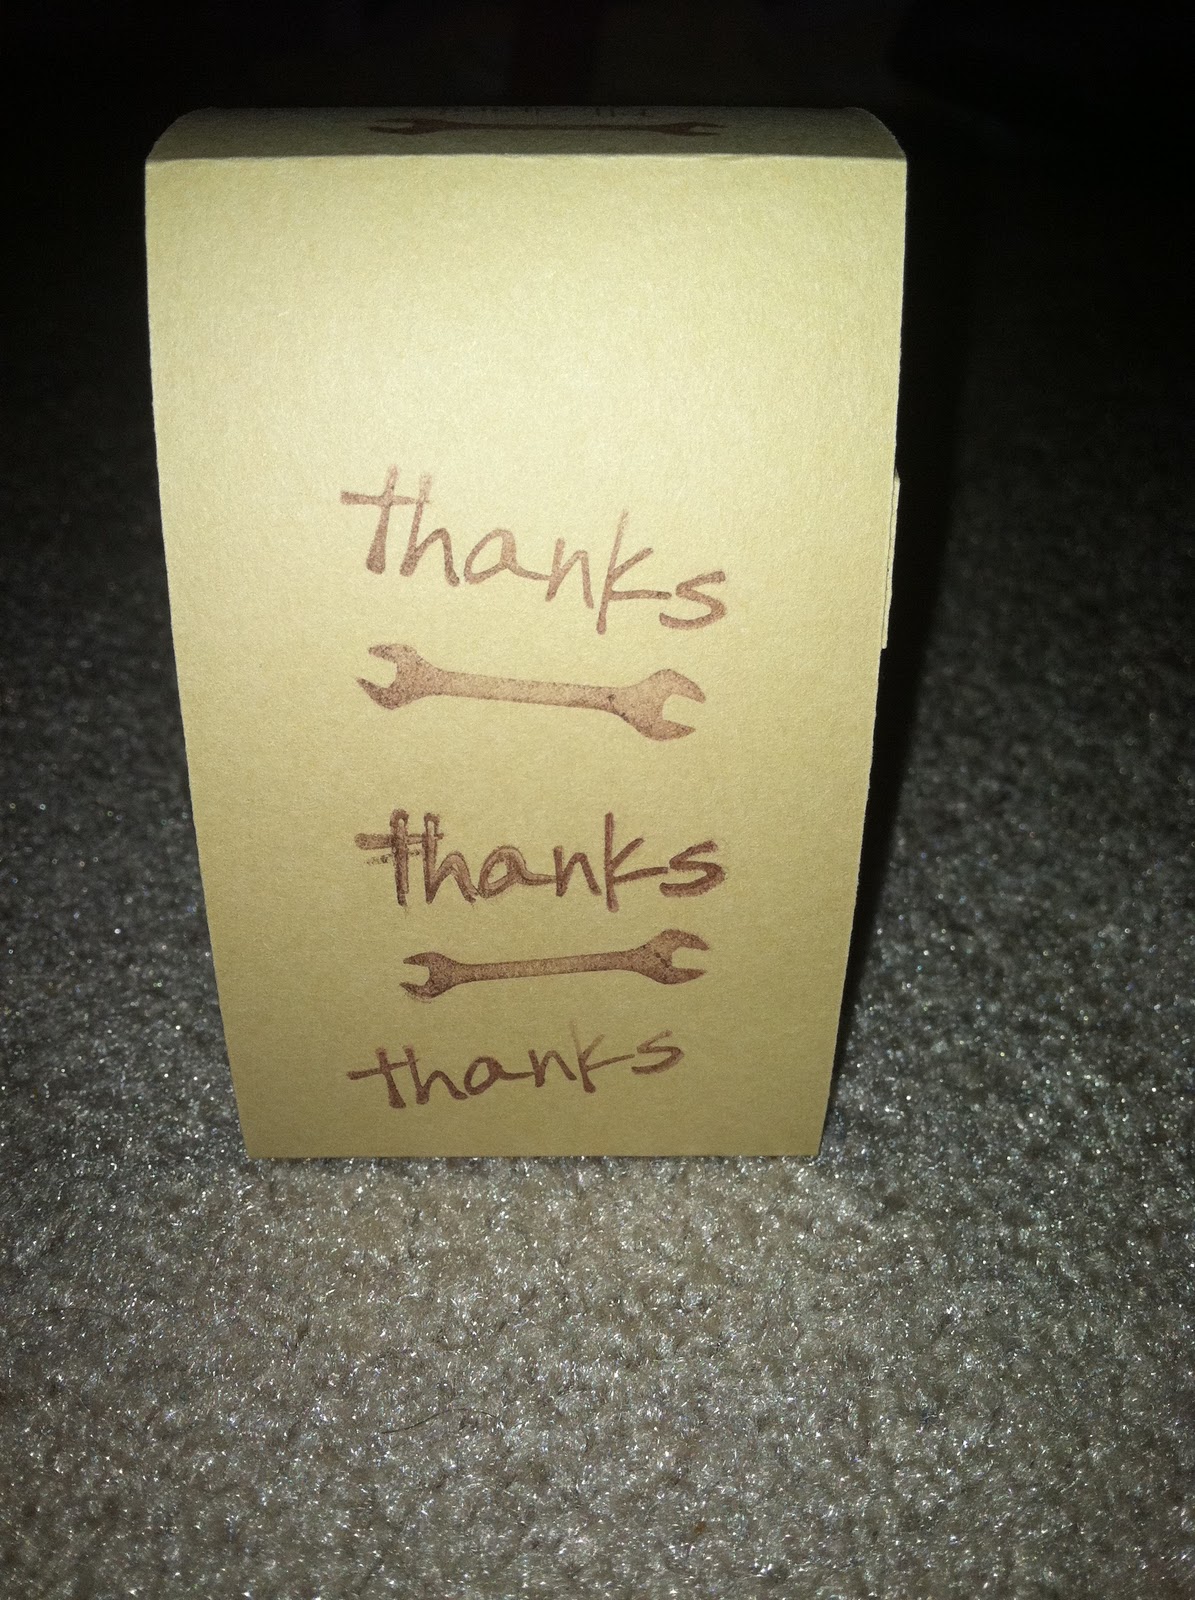
A little over a week ago I had to arrange for the clearing out of an old copy room to begin some construction for a new office space (I am in administration and this is one the least favorite parts of my job :).  There was a very old lab fridge and freezer in the space.  Unfortunately before they could be disposed of they had to be defrosted...they were GROSS!  Luckily some of my co-workers offered to help.  One guy even did most of the work on the freezer.  I know he loves those 5 hour energy drinks so I decided to get him one and knew I could make a little holder like those hand sanitizer holders I did last year at Christmas (found that idea online).  I had to make some measurement changes but it was actually easier than I thought.  I decided to use my Pink by Design Just 4 Men stamp set to stamp all over the holder with some of the different sentiments (note to self, do this before folder and adhering next time :).  I also had a cheapy little $1 set that had a wrench and another with the word thanks so I used those little stamps too.  I wrote a little note of thanks on the inside.  Nothing fancy but I think it is cuter than just a thank you card :)  TFL.


Thursday, November 3, 2011

Is Halloween really over?

I cannot believe it, I guess it is time to start getting ready for Christmas (I probably will do 2-3 Thanksgiving crafts but usually do not do too much for it).  I wanted to finish off Halloween by posting the final quick goodie bags I made for my co-workers and my boys teachers.  Also, 2 little goodie bags I made for our neighbors that we went trick or treating with on Halloween. 

As with my other bags I used Art Philosophy for the topper (cut the fancy square and then scored it in the middle).  Then for the S'MORES bags I printed the sentiment (thanks to Pink Cricut for the sentiment idea) on my computer and used the center cut feature to cut out the tag.  Super duper easy :)  For the kids goodie bags I cut the tags then I stamped the Happy Halloween using a stamp from the Guess Who set from Pink by Design stamps :)  TFL!

Here are some pics:


Thursday, October 27, 2011

Halloween Goodie Bags for Preschoolers and Teachers :)

Hello.  I saw these adorably decorated crayon boxes over on a My Creative Time designer's (Cathryn) blog http://inthepinkcathryn.blogspot.com/2011/07/my-creative-times-july-stamp-release.html back in July and immediately bought the stamp set with the intentions of doing this (a similar version of it) for my daughter's preschool class.  Then a couple of weeks ago I was in Target and saw cute little Halloween notepads in the $1 section (6 in a pack) so I bought those also.  I decided this week to put them in with the crayons to make a goodie bags...of course that meant I needed toppers.  I also decided to make some goodie bags for her two teachers using an idea I had seen around on Pinterest and other sites. 

Here are the bags for the kids:  For the crayons I used the My Creative Time all around Halloween set, some plain paper from AC Moore and some patterned paper from K&Co.  For the bag toppers I used Art Philosophy to cut the square in 2 sizes, then I scored it in the middle.  On the top layer I added stitching via gelly roll pens, either a ghost from Paper Doll Dress-up or a pumpkin from Create a Critter.  Of course they needed a cute little Peachy Keen face :)  I printed the names all one piece of card stock on the computer then cut out using the center point feature and one of the cute tags on Art Philosphy.  I then used the Happy Halloween sentiment from my Pink by Design Guess Who set to add the sentiment.  Lastly, I used the bonus stamp that came with Septembers new order stamps from My Creative Time on the back of the bags :)


Here are the bags for the teachers:  I used the same process for the bag toppers as above but I printed the sentiment on orange paper first, then cut the square using Art Philosophy.  I then cut the ghosts from Paper Doll Dress-up and used some cute Peachy Keen faces on them.   I plan to make some of these for my office staff as well this weekend for Monday.


I hope the kids and teachers enjoy their goodie bags!  TFL!