This is my personal blog that hopefully others will enjoy finding information on projects, ideas, etc. that I have created, scraplifted or borrowed :)
Showing posts with label My Creative Time. Show all posts

Friday, November 20, 2015

A Quick Sympathy Card

Hello.  With in the last week my fiance (yikes-yes I just typed that-I am engaged to be married in March) lost his best friend in a car accident and a family on my son's baseball team lost their daughter/step-daughter in a car accident.  I wanted to mail a card because while notes on Facebook or text, nothing beats a handwritten card.  I received so many while Ed was sick and when he passed and while they make me tear up, I still love to read them from time to time.  I had some pre-cut cards that I bought on sale a while back so I just added a piece of paper using some button brads, a tag that I used some Recollection paper punches to make (two sizes, one in a striped paper and one in white) and I used a My Creative Time sentiment on the white tag, I then just used some chalk to color the white paper.  I made two of the exact same cards just to make it easy.


Loss is never easy and of course helping Ricardo get through this brings up a lot for me, however, it also reminds me to rely on my Faith.  I am so blessed to have that Faith, it pulls me though each day, good and bad.  Thanks for stopping by.

Happy Crafting!


Monday, February 11, 2013

Teacher Appreciation 2013

Hello all.

The week before last was Catholic Schools Week for my 3 oldest children and the last day of the week is Teacher Appreciation Day and each year I try to make something for the teachers.  This year I decided to make a TEAcher appreciation gifts for each teacher (it has become more work since my oldest entered middle school there at the school (it goes from pre-k to 8th) because he has so many teachers but I do not want to leave anyone out.  I also do a gift for the Principal and the Admin. Assistant because they are so wonderful.  I found this idea online and LOVED it immediately so I began picking up the supplies back in January and actually got most of them done before the last minute :)  I put a tea bag, three packs of sugar and a spoon inside the cup.  I made the tags by hand cutting the pencil and it pieces so that took a lot more work than I expected, but I did not mind because they turned out so cute.  I used My Creative Time My Teacher Rocks sets for the sentiment stamps and I used a Peachy Keen set from their August kit for the pencil and face stamps.


I also wanted to do something for the other teachers so I decided to do this idea I had seen on Pinterest.  But I make one tag for each soda in the 6 pack, just so if the teacher wanted to keep the tag they could.  They were easy enough to print onto card stock (I made the from portion in word) and then I just punched out each piece and used adhesive to put them together with the ribbon in between the two pieces of the tag.  I put three 6 packs with the tags in the teachers lounge that morning.  I received multiple thank yous at pick-up last week.


Now I have to get to working on Valentine's Day!  Those will be finished up last minute probably.

Thanks for stopping by, have a CRAFTY day!

PS:  I am linking this up over at Sarah Hamer Designs so stop by and link up too!  http://www.pinkcricut.com/2013/02/link-tuesday-38/

Thursday, December 6, 2012

Altered CD Case

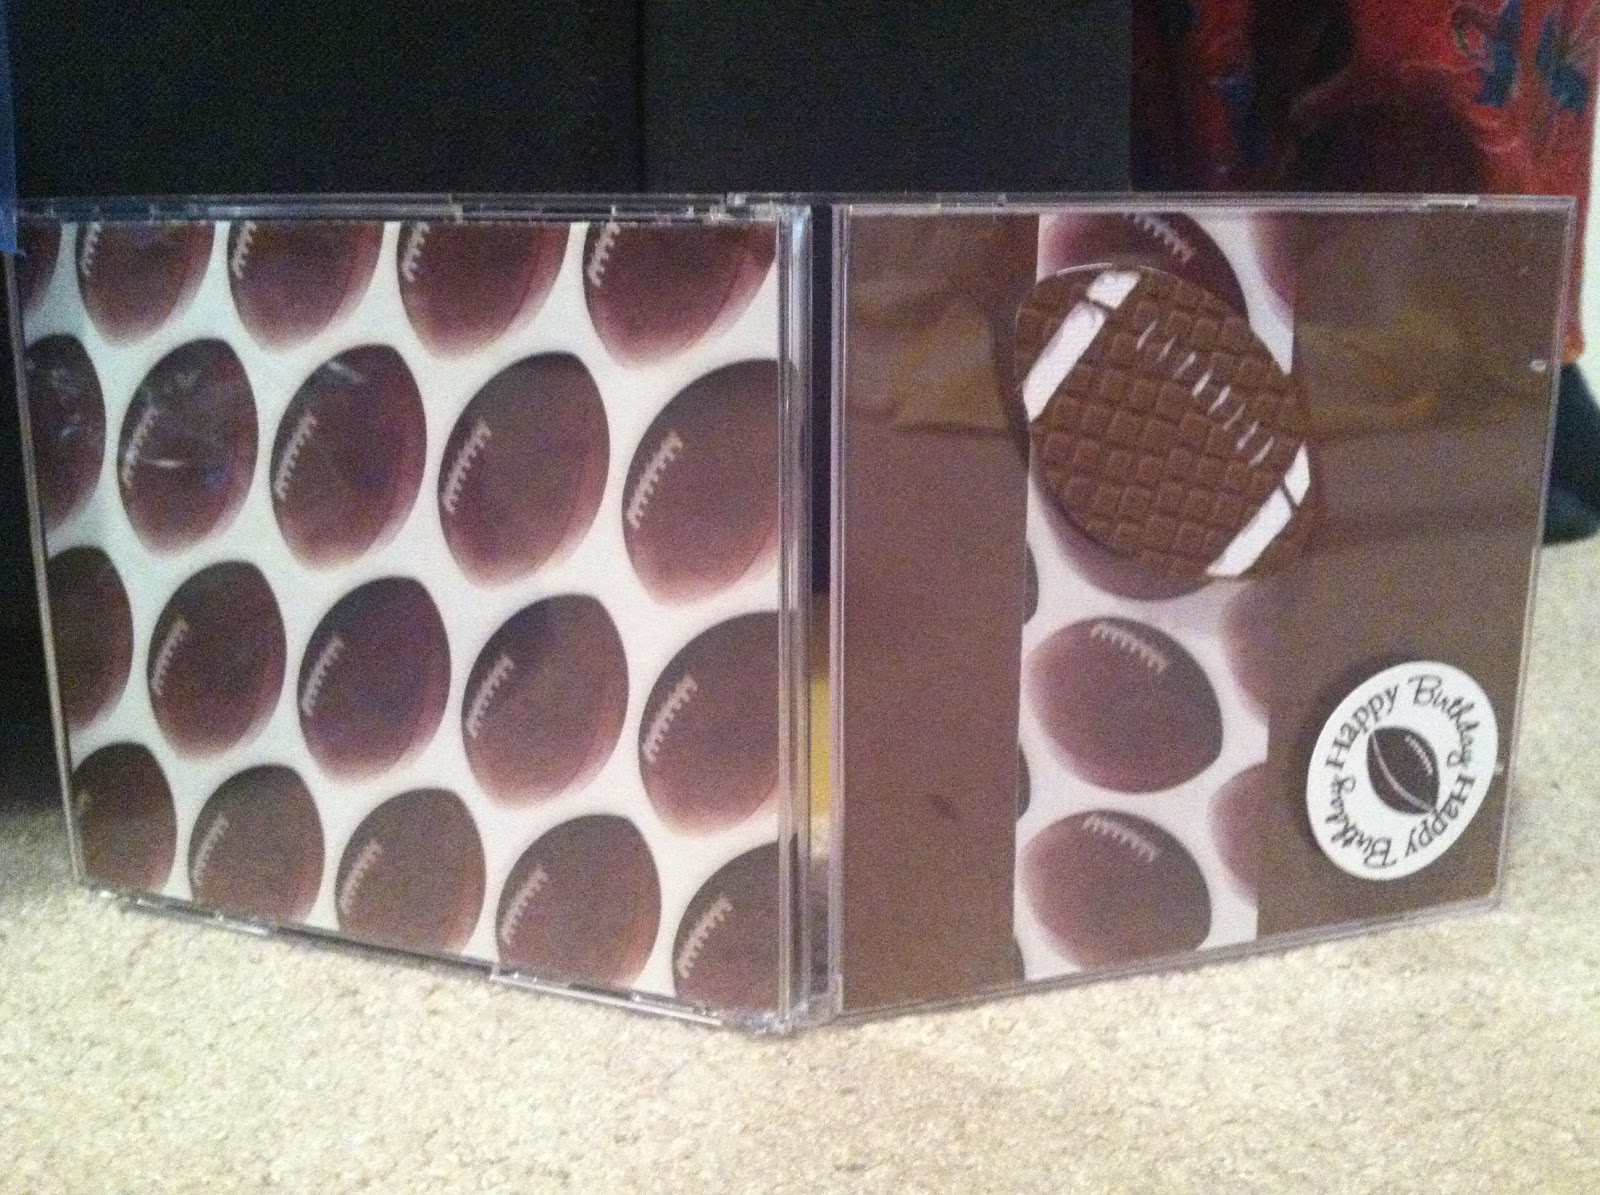
Hello!  My girlfriend Stephannie made me the cutest altered CD case with a Starbucks gift card in it (you can see it here) and she also gave me some empty CD cases to use myself so when I need a gift card holder for my son's good friends birthday I new I wanted to use one!  I used Stephannie's as inspiration.


I hand cut the paper just using the case for measurement for the front and back covers (put inside the CD case), I used some sports themed paper I bought years ago from AC Moore for the football patterned paper, then I cut the football for the outside from Sports Mania Cricut Cartridge and I embossed it used my Cuttlebug.  I used My Creative Time's All Around Birthday for the Happy Birthday circle stamp and then I used the football from My Creative Time's Touchdown stamp set for the center.   I used the My Creative Time's gift card die to cut my giftcard holder for the inside and stamped it with the Happy Birthday sentiment from the Gift Card Sentiment stamp set.  I added some faux stitching with my white gelly roll pen and some more of the football themed paper.   I used a few glue dots to stick the gift card holder on and filled it with a Sports Authority gift card (it is getting hard and harder to buy for my 11 year olds friends but they all love sports!).  I hope he liked it!

Thanks for stopping by, hope you have a craft day!

Thursday, November 29, 2012

Purse Explosion Box Post It Note Holder

A co-worker of mine has accepted a new position so we threw her a farewell get together.  She and I have worked together for almost 7 years so I wanted to make her a little gift.  I saw this purse explosion box at http://qbeesquest.blogspot.com/2011/01/explosion-box-purse.html and knew I wanted to try it.  Once it was made I thought it would be perfect as a post it note holder for her desk in her new office so I just added a pen and some post its.  I think it turned out cute for my first try :)


The best part is I only used 3 pieces of paper, a ribbon and velcro (to keep it closed).  One for the box, the black for the top (I used Art Philosophy to cut the topper) and accents and the pink animal print.  I love how cute it turned out and may do some in Christmas paper if I can find some cute Christmas post it pads for the teachers.  You could easily make it a gift card holder or add some candy.  So many possibilities!  I added the Thank You from a My Creative Time stamp set but you could do any sentiment here!

Thanks for stopping by!  Hope you have a crafty day!

Saturday, November 10, 2012

Thank You!

Last month my hubby and I wanted to go away for the night before he started chemo again.  One of my dearest friends Stephannie is best friends with a very nice lady who works at a hotel in Ocean City, MD where we wanted to go.  She got us a room and even sent us some wonderful dessert that night (strawberries and chocolate cake!).  We would have used our money to go because we wanted to go away but honestly the money we saved made a huge difference.  I wanted to make Brenda a card to thank her.  I just recently purchased the Faceless Fall 2 set from Peachy Keen Stamps and have been wanting to use it.  Why as soon as you add a Peachy Keen face to anything does it become the cutest thing ever?  I do not know!  I used my Everyday Character Assortment for the face.  I used My Creative Times All Around Everything for the thank you circle and I used a thank you sentiment from the My Teacher Rocks set for the Thank You in the middle of the circle.  I think the patterned paper is from a DCWV fall stack I had from last year.  I hope Brenda likes the card :)


Thanks for stopping by, I hope you have a craft day!

PS:  I will be entering this over at the PK Challenge so stop by and enter too!
http://peachykeenstampschallenge.blogspot.com/2012/11/peachy-keen-challenge-43-anything-goes.html

Thursday, November 1, 2012

Happy Halloween!

Hello all.  I hope everyone had a great Halloween.  We just survived Hurricane Sandy.  We were very lucky here in central MD to not get much (we had worse back in July with the Derocho storm).  We actually did not lose power which is amazing for us, we usually lose it for 4 days at a time.  I think we were better prepared this time.  Unfortunately, folks to the east and north were not so lucky.  We are praying for a quick recover for them all.

This year for Halloween I made two crafts (I still need to do something for my 3 year olds preschool class but have until next week :)).  First, I made cute little bats with a fun size Hershey bar in them for my 4 year olds pre-k class because she dressed as a bat :)  I used the Artiste cartridge for the bat, a circle punch for the face and some papers I had left over from last year.  For the face, I used a Peachy Keen set called Monster Mash (I combined a mouth and eyes from different stamps in the set because I did not want my bat to look mean:)  I had my daughter write her name on the inside and I used a ribbon that can easily be slid off to keep them closed.

Here are my bats and my cute little bat (I hand cut her mask because we could not find a bat costume):


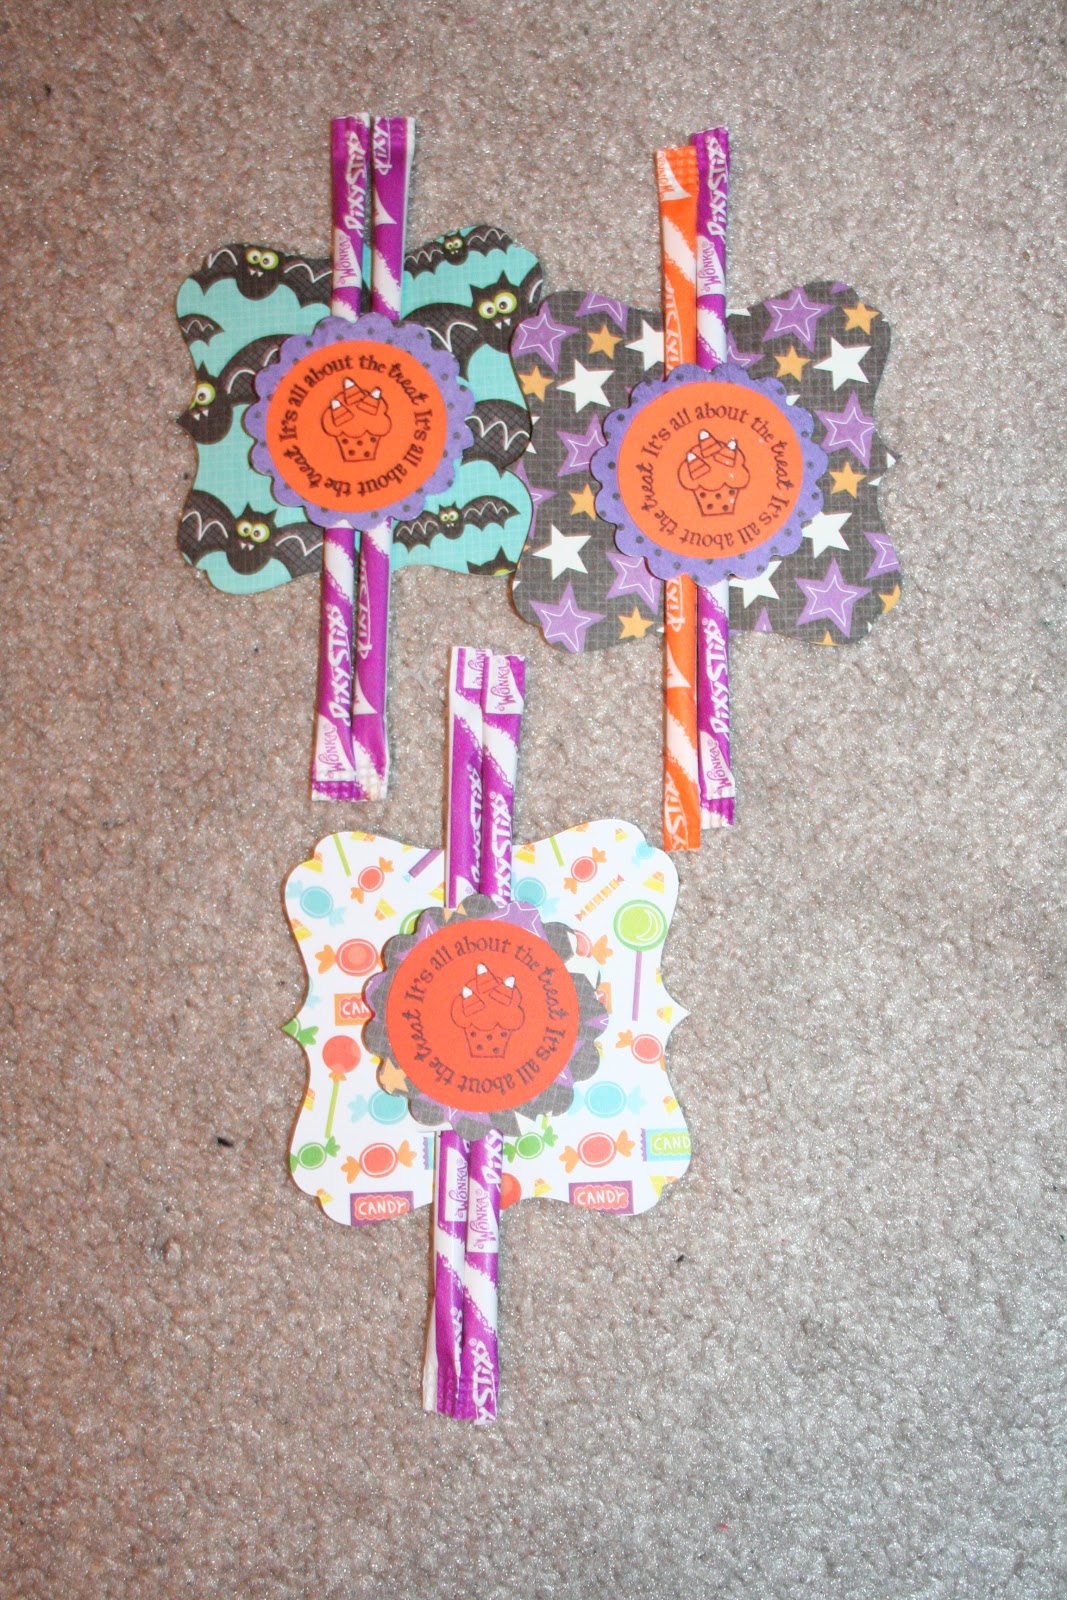
For my boys (9 and 11) I used this post from My Creative Time for inspiration and did some cute little cuts from Art Philosophy (I could cut 9 at a time versus using a die to cut one at a time) and put some pixie sticks through added a cute little Halloween sentiment from My Creative Times All Around Halloween set.

Here are those cute treats:


Lastly, for Halloween I made some costumers or parts of costumes.  For my 3 year old she wanted to be a bat and I am not a sewer so I decided to do hers out of paper.  I used the Art Philosophy for the tear drops which I then turned upside down.  I used Create a Critter for the owl which I had cut down to make into a mask and added some circles and small feathers and an elastic band to make into a mask.  She loved it and luckily it survived.  Of course she has to wear it next week to preschool because her class Halloween event was cancelled this week due to the Hurricane so I hope it makes it until then!  I also made my 9 year old sons Jayson Werth beard using a picture, some cardstock and some elastic.   Here is a picture of the two cuties:


My oldest wanted to go as the Sun Drop guy (have you seen those soda commercials, he walks around dancing which cracks my son up).  All I had to do for him was make an iron on since we did not have a Sun Drop t-shirt.  It worked ok but I did not have the iron on for dark colored shirts so it is not that visible via picture.  Here is my handsome guy:


WOW! That was a lot in a few days of work!  I guess now it is onto Thanksgiving and Christmas!  Thanks for stopping by.  I hope you have a crafty day.

PS:  I am linking up over at Sarah Hamer Designs, stop by and link up too!  http://www.pinkcricut.com/2012/10/link-tuesday-25/

Tuesday, October 16, 2012

Happy 5th Birthday Little Dancer

My daughters are going to a 5th birthday party this weekend for our neighbor who also happened to be in ballet with my older (4) daughter. I knew right away I wanted to use the Twinkle Toes cartridge.  This little ballerina is just too cute!  I have to make this same card for my little ballerina when she turns 5 this January!


I used Twinkle Toes for the ballerina and Art Philosophy for the card base (I welded the two shapes together to make a card, the cut it a little smaller and cut in the middle for the patterned paper).  I used Peachy Keen Princes Faces for the face and I used My Creative Time for the All Around birthday stamp.  I used an Action Wobble to make my little dancer dance!  I used my white gelly roll pen to add the faux stitching accents.

Thanks for stopping by, hope you have a crafty day!

PS:  I am linking this up over at Sarah Hamer Designs so stop by and Link Up Too!  http://www.pinkcricut.com/2012/10/link-tuesday-23/


Thursday, August 23, 2012

Brownies and a cute plate from Pinterest!

Hello all.  I wanted to make some brownies for the nurses at my husbands Oncologist's office because they are so sweet and do such a great job of taking care of people all day each day.  He had to go in today so I made some chocolate chunk and peanut butter chip brownies.  I had recently seen this cute idea on Pinterest on how to upgrade a simple paper plate.  I used a cute ribbon I already had to make my plate cute and to tie the plastic wrap that I used for the brownies :)  I use my pizza cutter to cut the brownies to try to make them nice and sqaure :)


Then I used my My Creative Time XL Label Die and XL Label Borders stamp set to cute and stamp a cute tag.  I then used a cheapy $1 stamp for the thanks so much sentiment, I added a little to it with my white gel pen.

The nurses loved it and I even overheard one of them talking about how cute the plate was :)

Thanks for stopping by.  Have a crafty day!

PS:  I entering this over at My Creative Time's Pinterest inspired challenge (http://www.creativetimeforme.com/2012/08/new-challenge-host-emma-pinterest.html) and linking up over at Sarah Hamer designs http://www.pinkcricut.com/2012/08/link-tuesday-17/ ) .  Stop by and enter the challenge or link up too :)

Wednesday, February 22, 2012

Cooking with Cricut Weekly Challenge-Birthday and Cake, Balloons or Cupcakes

Hello and welcome to another Cooking with Cricut Weekly Challenge.  This week the theme was birthday but you also had to include either a cake, cupcakes or balloons. 

I chose balloons (I used Create a Critter for the balloons) :)  I just love the colors pink and green together too so I used those colors for my card.

Here it is:


I had to add some cute Peachy Keen faces and the sentiment is from My Creative Time.


Now I hope you will stop by Cooking with Cricut and see what all of the designers have come up with this week and join us in the challenge! 

Thanks for stopping by, have a crafty day!

Tuesday, January 10, 2012

School Birthday Goodie Bags

So 1 out of 2 is not bad right?  I did stay up late making goodie bags.  I really did not do much other than put the goodies Ally picked out into a bag and make some easy tags.  Since it was late I did not want to use my Cricut because it can be loud, my house is small and my girls room is above my craft room.  A few times I have used it late and one of my daughters will come down and ask me what I am doing so I know the sound carries up there, LOL.

Here is the tag:


I used my Creative Memories tag punch and circle punch and my Fiscars scalloped circle punch.  For the sentiments I used My Creative Time's All Around Birthday set.  Then (because I made girl and boy bags) I wrote each childs name on the tag and on the back I wrote From Ally.  It worked perfectly and Ally was SO excited to take them to school today.  I did not get to make any cupcakes or cake balls but we went to the store and bought some pink iced mini cupcakes which made her morning!

Tuesday, December 6, 2011

Cute Cupcake Birthday

My girls were invited to a birthday party last weekend so I wanted to make a cute little cupcake card.  The little girl was turning 3 so I did 3 cupcakes.  

Here it is:


I used my NEW (yeah) Princess Faces Peachy Keen face stamps (I love those little lips, LOL).  I used Once Upon a Princess for the cupcakes and I used My Creative Time Many Greetings for the Happy Birthday sentiment.  I used an edge trimmer for the candles and I added some gold stickles for the "flames".  I also added some pink stickles to the cupcakes.  TFL!

Monday, November 14, 2011

Quick Sports Themed Gift Card Box

I used Sports Mania to cut out two footballs to decorate this little gift box (I used Art Philosophy for the box but you could find a template online or use another cartridge). I embossed the footballs after I cut them and then I ran them through my Xyron to ensure they would stick completely. I finished off the box with some football ribbon :) This is for a gift card for my son’s football coach but could easily be for a boys birthday also.  I just saw on the My Creative Time sneak peak for this week she has some coach's and sports sets coming out this week, so those would compliment a box like this!  Be sure to check those out.  I may have to order them and add a nice little tag to this gift :)  Thanks for stopping by, if you want to see other projects I have made with Sports Mania, stop by Cooking with Cricut today for the Sports Mania cartridge spotlight!


Thursday, October 27, 2011

Halloween Goodie Bags for Preschoolers and Teachers :)

Hello.  I saw these adorably decorated crayon boxes over on a My Creative Time designer's (Cathryn) blog http://inthepinkcathryn.blogspot.com/2011/07/my-creative-times-july-stamp-release.html back in July and immediately bought the stamp set with the intentions of doing this (a similar version of it) for my daughter's preschool class.  Then a couple of weeks ago I was in Target and saw cute little Halloween notepads in the $1 section (6 in a pack) so I bought those also.  I decided this week to put them in with the crayons to make a goodie bags...of course that meant I needed toppers.  I also decided to make some goodie bags for her two teachers using an idea I had seen around on Pinterest and other sites. 

Here are the bags for the kids:  For the crayons I used the My Creative Time all around Halloween set, some plain paper from AC Moore and some patterned paper from K&Co.  For the bag toppers I used Art Philosophy to cut the square in 2 sizes, then I scored it in the middle.  On the top layer I added stitching via gelly roll pens, either a ghost from Paper Doll Dress-up or a pumpkin from Create a Critter.  Of course they needed a cute little Peachy Keen face :)  I printed the names all one piece of card stock on the computer then cut out using the center point feature and one of the cute tags on Art Philosphy.  I then used the Happy Halloween sentiment from my Pink by Design Guess Who set to add the sentiment.  Lastly, I used the bonus stamp that came with Septembers new order stamps from My Creative Time on the back of the bags :)


Here are the bags for the teachers:  I used the same process for the bag toppers as above but I printed the sentiment on orange paper first, then cut the square using Art Philosophy.  I then cut the ghosts from Paper Doll Dress-up and used some cute Peachy Keen faces on them.   I plan to make some of these for my office staff as well this weekend for Monday.


I hope the kids and teachers enjoy their goodie bags!  TFL!

Tuesday, October 25, 2011

My Creative Time Design Team Call

Hello.  I have decided to take a chance at the design team call for My Creative Time, I think my work is a bit subdued or simple compared to their current design team who are totally awesome but I thought I would give it a try anyway :)  I made this card using their Game Night set.  The card is for my mom.  She loves bingo and cards so this set showing a lucky winner on both the bingo (by adding bling) and the cards (added some stickles) shows her how lucky we are to have her!  I think she will love it.  I plan to give it to her along with the cheesey gifts we brought her back from Florida.  I used Art Philosophy for the stars, I used the center cut feature after I printed the sentiment out from my computer.  I also embossed and inked my white background sheet.   I added some ribbon and bling and there it is!  TFL.